|
How to model seas for small scale static
ships.
|
|
|
|
Realistic seas for small scale model ships have always been something of a problem. Probably the best ones I have seen have been carved from wood. These, however, require considerable carving skills and even fitting the model into the sea is difficult. Other methods produce results which are often less than satisfactory. Model makers will no doubt develop their own favourite methods and I am not saying that mine is the best, but it suits me because it is inexpensive, quick and very permanent. The use of plasticine may put people off, but models I made over thirty years ago using this useful material have remained unchanged. Some time ago, three models were brought along to me for repair. I had built them several years previously using the plasticine sea methods. The models had been badly damaged by nothing more complicated than a large picture falling off a wall and landing on top of them. During the repair, I noticed that with the passing years, the plasticine had actually gone quite hard. This is my method. |
|
|
| PHOTOGRAPH 1 |
|
|
|
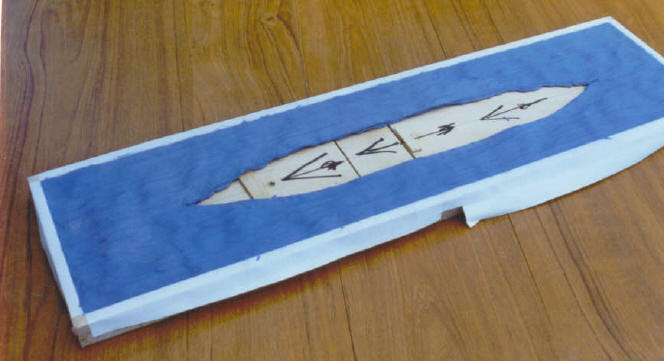
Warm a bar of plasticine to
make it soft. (I use a microwave oven) and when it is soft enough,
press it into the tray around the ship Remove the hull and form the
sea surface by rolling a large steel ball bearing or marble backwards and
forwards along the surface with the palm of the hand. When you are
satisfied with it, fit the model again and carefully push the
plasticine
up to it to ensure a good fit. I always draw the direction of travel of
the model in this gap with a fibre pen because I once painted the sea the
wrong way round and as it was for a sailing ship, the length of the
bowsprit and jib boom made it overhang the end of the sea so I had to let
it all dry and then paint it the correct way round! Mask the wood
edges. |
|
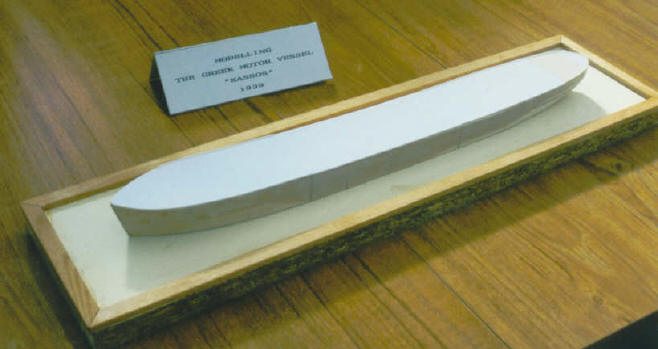
This shows the unpainted hull fitting perfectly into the sea. It is most important that the model is not painted at this stage as the plasticine would make a mess of the paintwork. The use of blue plasticine in this case has no significance as it is to be painted. But remember, if you use colours such as red or yellow etc and any does happen to show through, it will not be as unobtrusive as blue! |
|
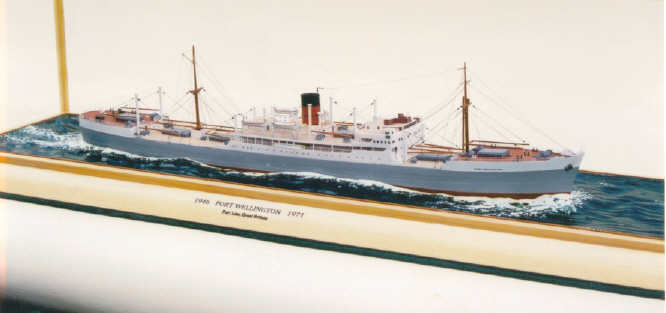
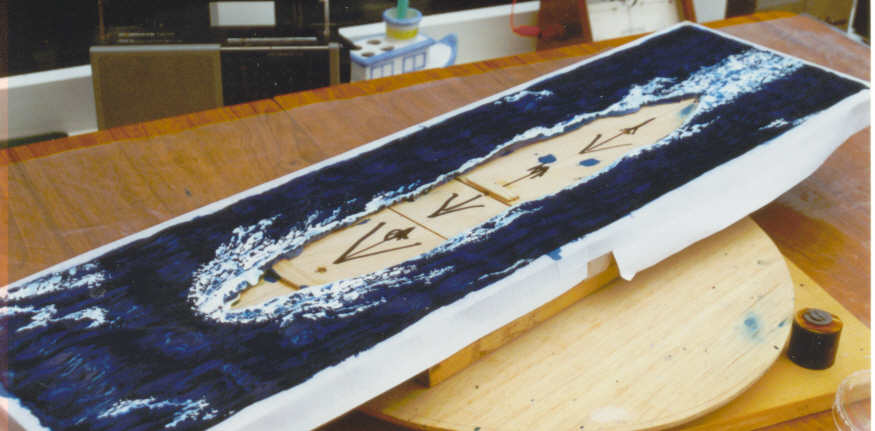
Before you paint the sea, remove the model. First of all, the plasticine must be primed. This can be done with a Humbrol matt paint or grey primer (Grey primer from Halfords automobile accessories U.K.). Then paint the main sea colour. In this case I have chosen a dark blue Humbrol enamel gloss. Whilst it is still wet, add the bow wave, wash and wake using white enamel gloss. Because the blue is still wet, the white will run into it to a certain extent giving it a “wet” look. When this is semi dry, you might add further white where needed. The whole thing can then be left to dry whilst work continues on the model, When the model is complete, it may be screwed into the sea. This leaves a “dry” looking junction between hull and sea. Using a fine paintbrush, fill this gap in with “Ash Tree” thick acrylic gloss varnish. This dries clear. I obtained it from a local art suppliers, it is a “texturing” medium. It gives a very realistic “wet” junction between model and sea. The three models I have used to illustrate this article were all built to scale of 32 feet to one inch. The completed model of PORT WELLINGTON (Photograph 5 Top) has a hull length of 16.5 inches. |
|
|