|
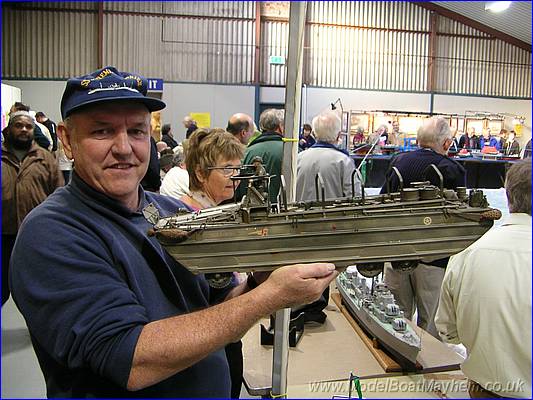
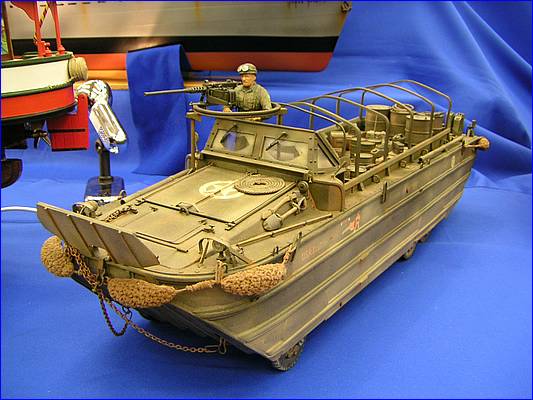
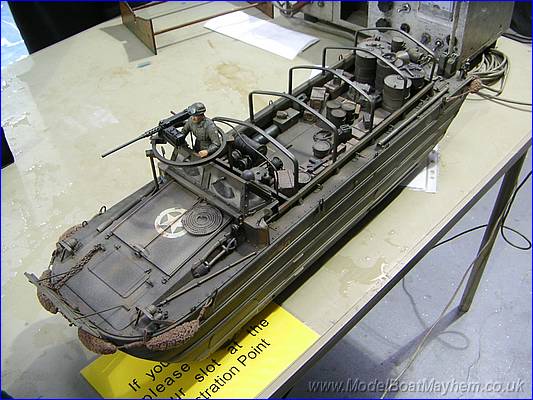
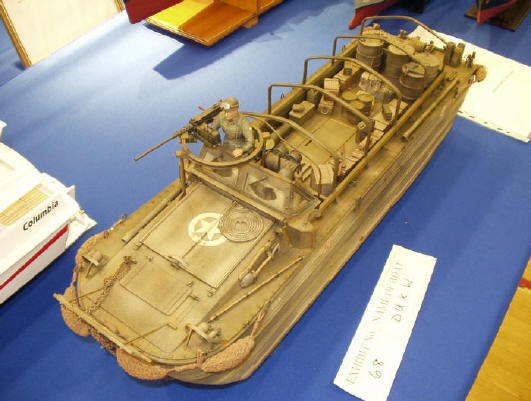
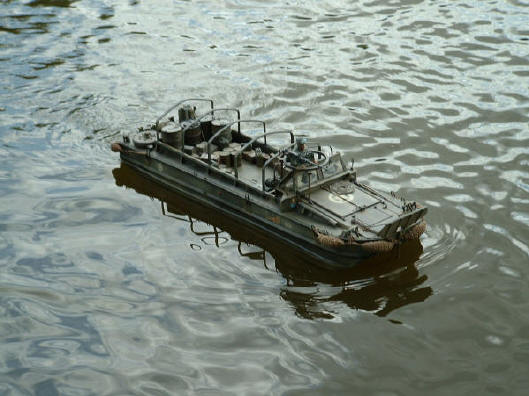
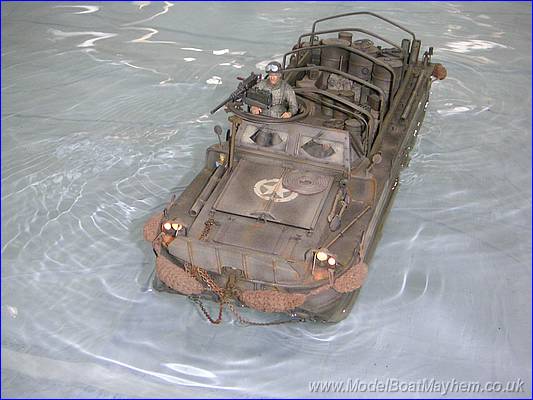
Stan Reffin - Strach built D.U.K.W |
|
Ahoy all modellers! |
|
|
|
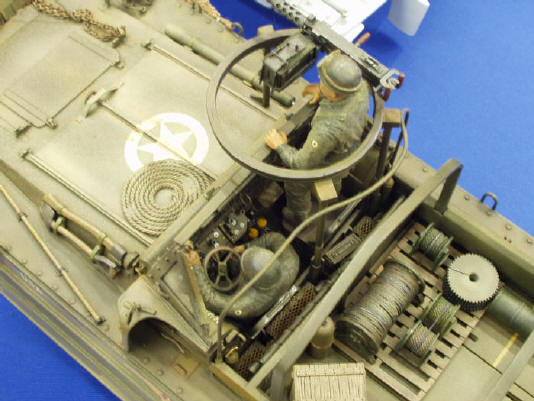
Method used to paint my 1/16 scale D/U/K/W All wood parts where first rubbed down and any filling carried out to remove any holes or indentions after this 2/3 coats of sanding sealer where applied. I used Screwfix direct sealer. This a varnish based product and so far there are no signs of the paint work cracking, this is common problem with other sanding sealers. All plastic parts where washed in warm soapy water and left to dry. The entire model was sprayed with Halfords grey acrylic primer. After 5 days the first colour was applied, this was mixed using olive drab and matt black to give a very dark green finish. The second colour was olive drab with no other colours added using a airbrush spray the model, giving some parts a large concentration of paint and others just a dusting. This will produce a shaded affect when dry i.e. light and dark areas on the model. The third colour to be applied was Tamiya dark earth. This was applied heavily at the bottom of the side panels fading to nothing towards the top. This can also be used on the front panel. The fourth colour to be applied was again Tamiya light buff. This is only lightly sprayed over the dark earth and green. This again gives a shaded effect to the dark earth and produces splash marks over the entire vehicle. Rusting was carried out using Railmatch paints supplied from Howes Models Oxford. The first colour to be applied was brake dust which was lightly dry brushed and allowed to dry. I then dry brushed medium rust over the brake dust and this gives a rich rust effect. Finally the entire model was washed over using thinned black and brown paint. This will find all the cracks and crevices and produce areas of shadow on the model. The cargo flat bed was first sprayed with desert yellow and again using olive drab lightly over sprayed the yellow, this again gives the impression of warn paint with the timber showing through the green.
Windshield
Decals
Browning machine gun
This is only a very brief account of painting my model. My tip is to visit, if possible, any plastic model shows and talk to different modellers about painting. Good tips can be obtained from them. Stan Reffin Kirklees Model Boat club.
|
|
|