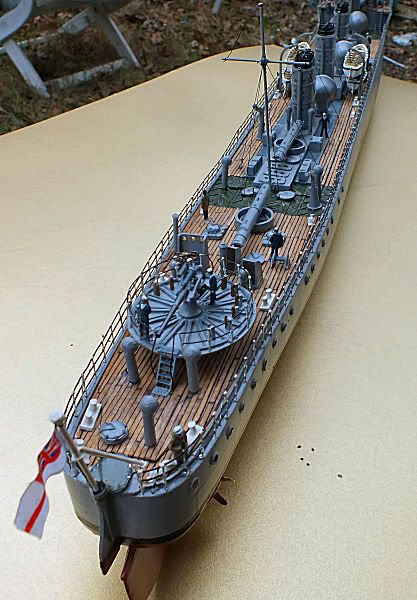
Conclusions & Build SummaryBefore final sea trials in completed trim, which will officially conclude this build, I’d like to share my thoughts and offer some conclusions.
Please remember I only got back into models last year, having scratch built static non ships in my teens.
My first ship kit, this build took just over four months, mostly evenings.
This ‘kit’ has proved excellent value, less than 50p per hour in enjoyment, although I have spent much more in going beyond Deans build intent. For anyone considering building one as per the instructions it is an excellent starter project, with ample scope to customise and provide extra challenges. Good full size plan with colour photos, well detailed instructions, cast & resin fittings good quality needing minimal cosmetic finishing. The decks and superstructure are printed plastic, not CNC cut, so measure carefully before cutting. Only a few adjustments were needed.
 Some
Some (maybe obvious)
tips from an almost newbie: - Start by reading everything at least twice;
- Don’t get anything out of the box until it’s needed;
- Work out a detail stage plan, and think several stages ahead;
- Make up sub assemblies wherever possible;
- With the flexibility of GRP hull sides make sure you fit plenty of under-deck support beams of exactly the right size to ensure the decks fit well.
Patience and planning.
Also, if you’re going to expend this much time and devotion into building a model, don’t go ‘cheap’ on running gear and electrics. ha'porth of tar ?
My additions to spec included twin motors and shafts, improved rudder, going overboard on anti-slip, litho and other detailing, individual deck planking, portholes, and single stanchions rather than the etched flat rail sections supplied. I hope this build shows what can be created from a ‘kit’ costing less than two hundred, plus the cost of my additions.
Things that hurt my brain along the way were diversions of my own making. My first brush with airbrushes, planking, glazed portholes, and the stanchions. However, nothing ventured, nothing learned. Yes, I can see many things I could have made better, which will be on my next build after experience gained. I hope my photo log will encourage others to test their limits. You may be surprised and pleased with the result.
Thank you to all who have given advice and tips during this project.
Special credits to suppliers Deans Marine, John R Haynes, and Mantua Models (just down the road).
Batteries charged. Departing fitting out basin (bath test), course set for Black Park Lake. ETA this weekend.
 Author
Topic: HMS Amazon 1906 - Build (Read 51208 times)


