|
Schnellboot -
My Build of Jack's Robbe S130. |
|
Click photos to
enlarge.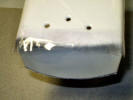 |
|
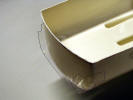 |
I covered the rear of the hull with several layers of Sellotape and mixed up a little ABS glue and run it on to the Sellotape. The Glue then take up the shape of the hull via the Sellotape and all that is left once dry is to sand it back to the transom. This little fillet is a small job, but very difficult to do and get right. |
 |
I went to the Northern Model Boat Show on Saturday and was chatting with my mate on the Scoonie's stand, he was telling me about a different type of ABS glue that he had come across. Normally I would use Stabilit Express made by Pattex for all the important ABS plastic joints but Scoonies swore by a new(?) glue called Quantum, made by Holdtite - "It's half the price of Stabilit and easier to mix!" I was sold and bought some - if that make sense! |
 |
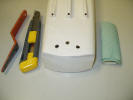
Slight accident with the mixing process - it splurged out and on to my desk when I first cut it open - so I just decided to mix it where it landed! Coffee stirrers make excellent glue mixers! Also on opening the glue, the familiar smell of Stabilit filled the air so I felt reassured that it was good stuff. |
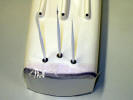 |
As usual I mixed too much glue so rather than waste it I glued in the rudder tubes. With fumes filling the air and glue starting get over a lot of things that I didn't want it to get over I suddenly thought how am I going to line up the rudder tubes? To keep them clean, I picked up a tube with another coffee stirrer and found it to be a perfect fit. I then picked up the other two rudder tubes, glue them up and inserted them in the upturned hull. because of the extension of the coffee stirrers, the rudder tube could now be easily lined up by eye from all angles - clever me, (and a bit lucky!) |
 |
Once set, the excess glue was cut and sanded off. |
 |
Mixing up more Quantum glue ( this time on paper! ) and reinforcing the rudder tubes. |
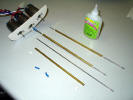 |
Preparing the prop tubes & gluing in the plastic stuffing / bushings. The motor couplings are rubber tubes and surprisingly very tight to fit, so for alignment purposes I'm using plastic electrical sheathing from an unsafe and discarded mains lead..... well it's unsafe now! |
|
|
One of the shafts in the 'raw'. |
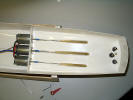 |
After much double & triple checking, I glued in the motor bulkhead and shafts. At the begging of the instructions, it says there is no need for a plan but here it says check the plan for measurements!!! A lot of head scratching later I worked it all out - crossed my fingers and tacked it in place with Super glue - at this stage I wished I hadn't crossed my fingers.... where my Superglue skin de-bonder?!
|
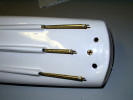 |
Looks good. |
 |
Gathering together the rudder assemblies |
 |
All washers assembled and the shafts greased and inserted. |
|
|
|
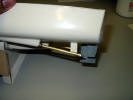 |
Shaft brackets shaped and glued in place... not Robbe's greatest engineering achievement! |
 |
Preparing the rudder servo. |
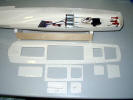 |
I next had to cut out the deck to check the location of the rudder servo, to allow access later. THE INSTRUCTIONS ARE TERRIBLE HERE AND THE CUTTING LINE IS EVEN WORSE! 'Wing and a pray' come to mind. I can see that the deck is going to give a lot of trouble when it comes to making a good hull / deck join! |
 |
The deck laid on to check layout. That deck.....Hmmmm! I think I going to have to read and re-read those instructions several more times to make any sense of them! |
